
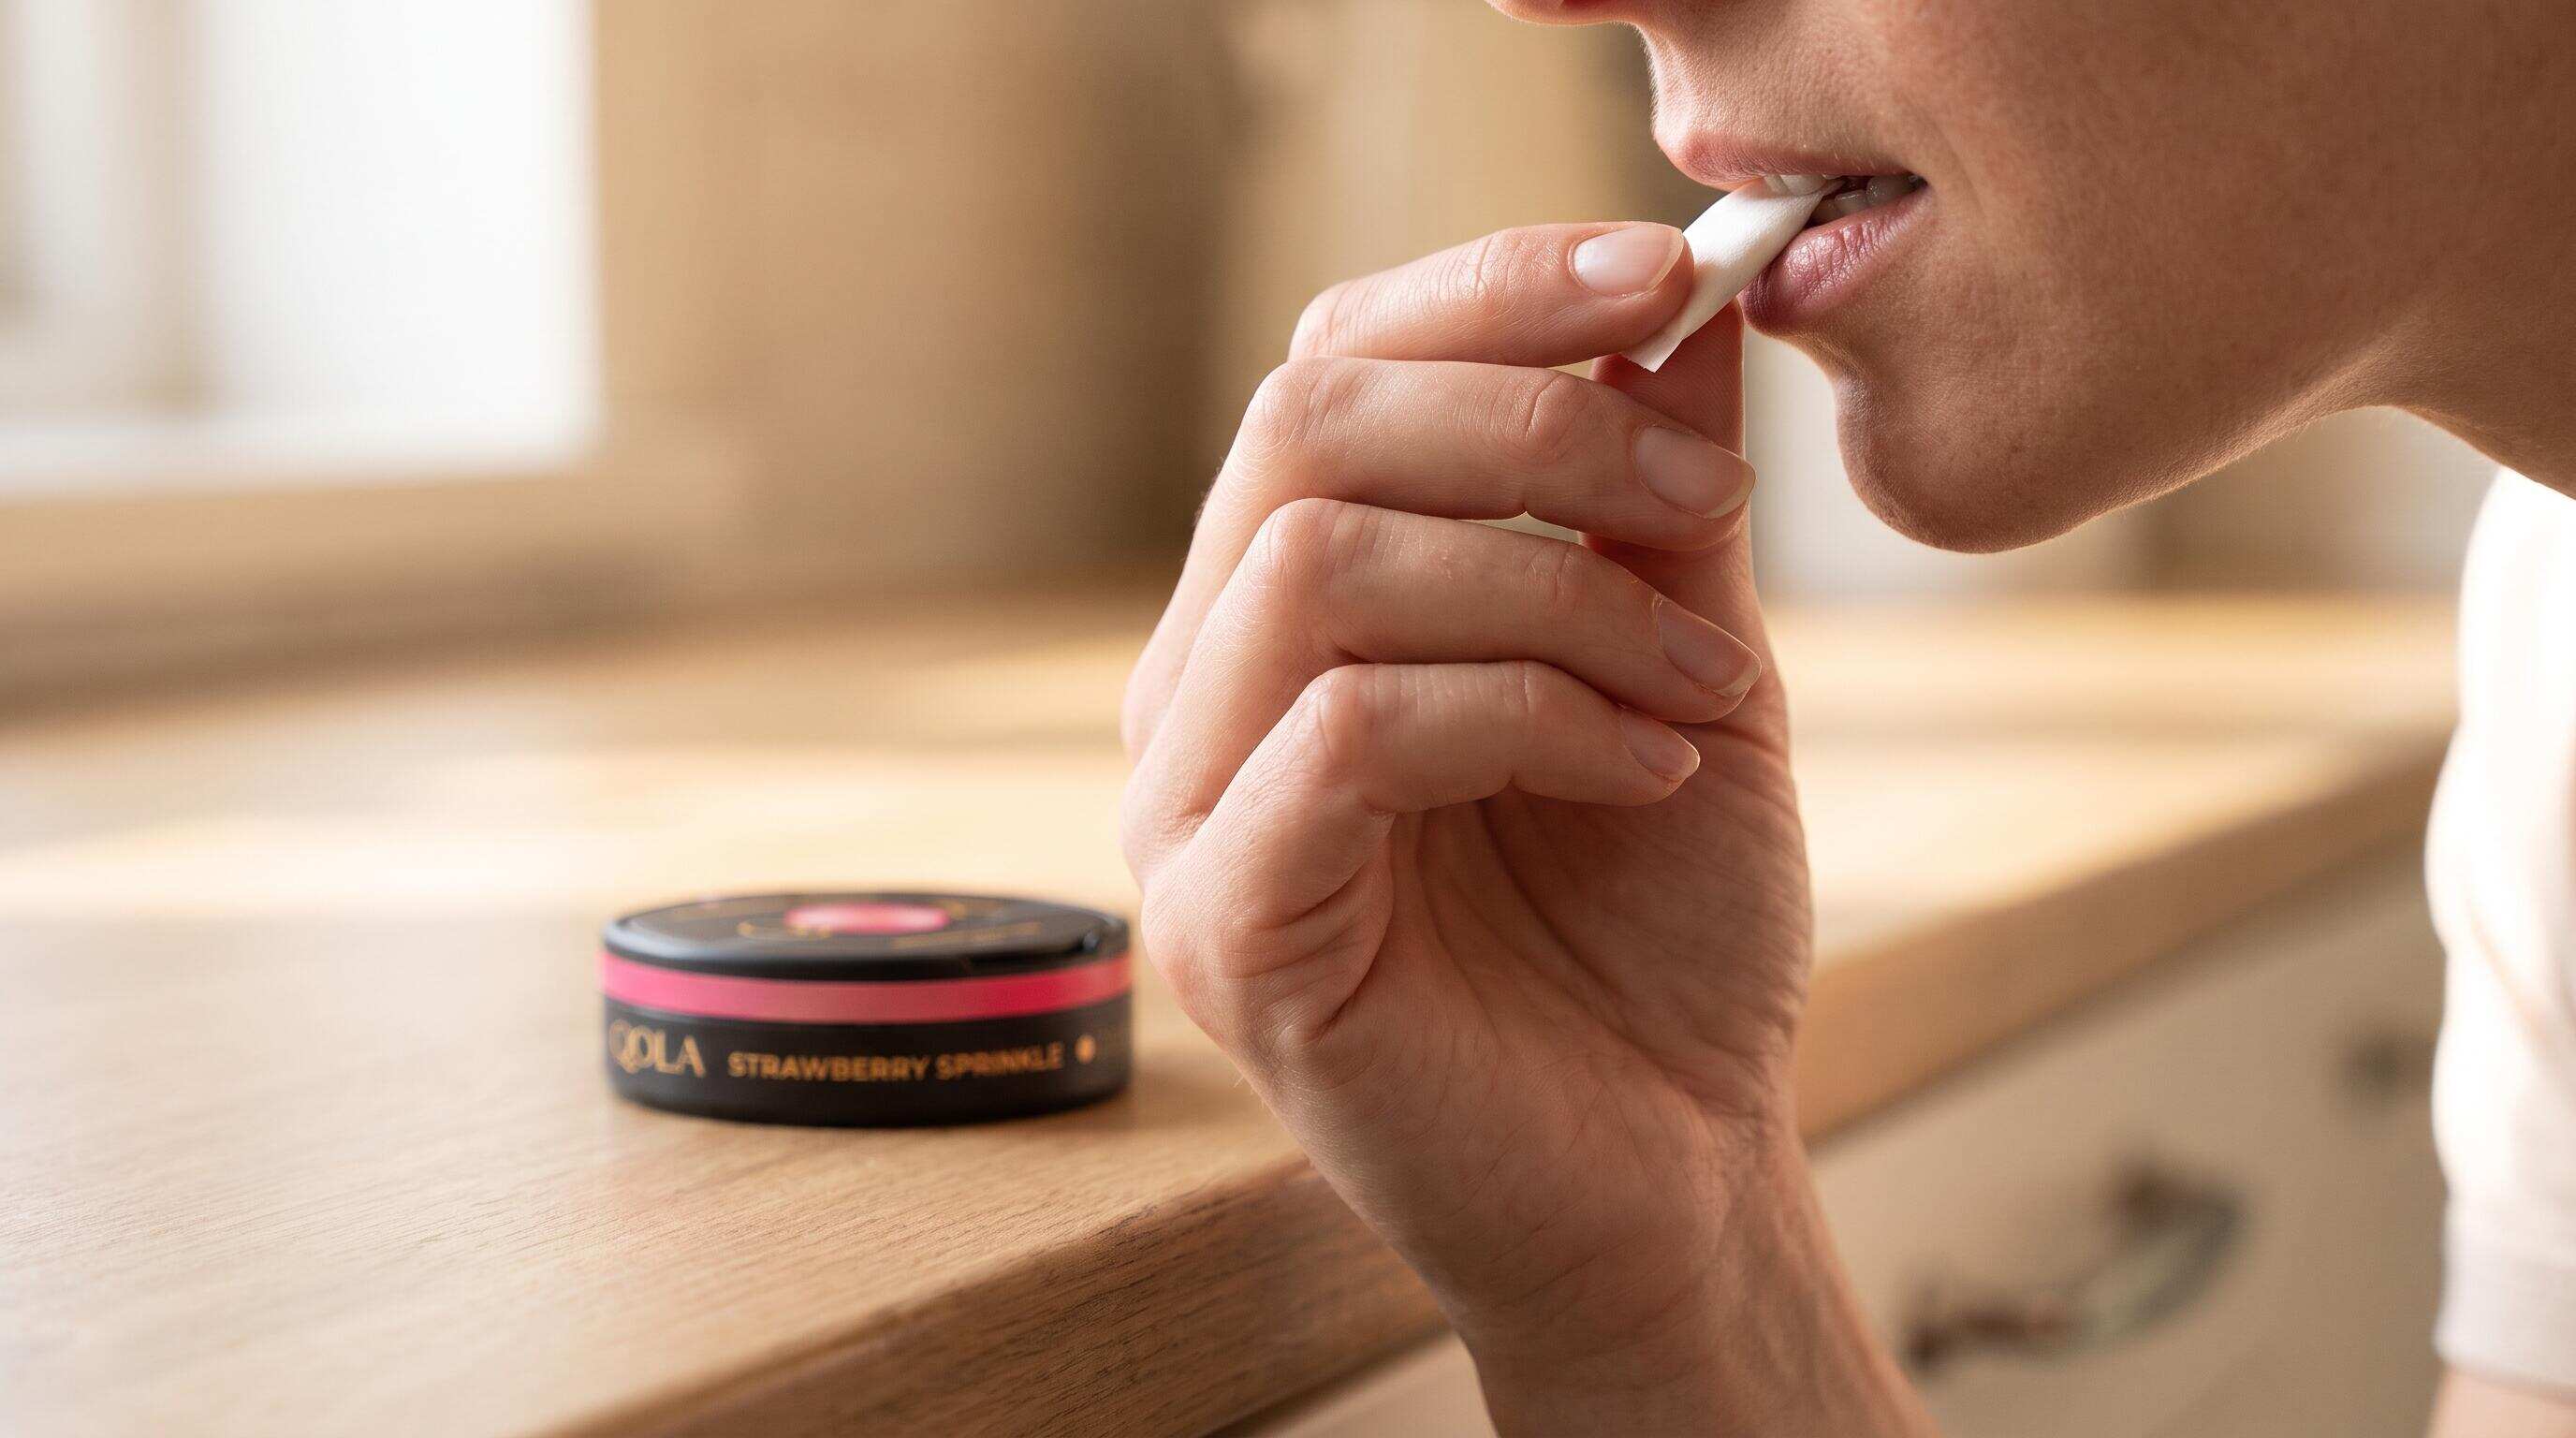
Your Step-by-Step Checklist for Using a Nicotine Pouch Correctly
You've picked up your first tin of nicotine pouches — or maybe you've been using them for a few weeks and something still doesn't feel quite right. Perhaps the pouch shifts around, the flavor fades faster than expected, or you're getting a mild sting you weren't anticipating. These are some of the most common experiences we hear about from new users, and almost every one of them traces back to one thing: placement.
Getting pouch placement right is the single most impactful skill in the entire nicotine pouch experience. It affects how efficiently nicotine is absorbed, how long the flavor lasts, how comfortable you feel during use, and whether you walk away satisfied or mildly disappointed. This checklist walks you through every variable worth checking — from the moment you open the tin to the moment you discard the pouch responsibly.
Each item in this list was chosen because it addresses a real, recurring friction point. If you're new to tobacco-free nicotine pouches, consider working through every step in order. If you're already experienced, use the checklist selectively to troubleshoot whatever isn't working. For a broader introduction to nicotine pouches and how they work, the complete beginner's guide to nicotine pouches is a solid place to start before diving into the specifics here.
The Placement Checklist: Every Step That Actually Matters
Choose the Right Strength Before You Even Open the Tin
Correct placement starts before the pouch ever touches your gum. Using a strength level that is too high for your tolerance is one of the most common reasons new users report discomfort, dizziness, or a burning sensation — none of which have anything to do with placement technique itself, but everything to do with preparation.
Nicotine pouches are available across a broad range of nicotine concentrations. QOLA's lineup, for example, runs from 4mg to 20mg per pouch, covering everyone from first-time switchers to experienced users who need a more substantial dose. If you're just making the transition from cigarettes or vaping, starting at the lower end of the range gives your body time to calibrate without overwhelming your system. The full strength range breakdown from 4mg to 20mg provides a clear framework for matching your existing habits to the right concentration.
Best for: Anyone new to nicotine pouches, or users who are transitioning from a different nicotine format and need to recalibrate their tolerance.
Watch out: Assuming a higher strength will simply "work better" or last longer — it may deliver more nicotine than you're ready for, which can undercut the experience rather than enhance it.
Wash Your Hands Before Handling the Pouch
This one sounds basic, but it matters more than most users expect. Nicotine pouches sit directly against your gum tissue, which is permeable and sensitive. Any residue from food, hand lotion, or general daily contact can transfer to the pouch and affect both the flavor and the feel against your gum.
In practice, clean dry hands give you better tactile feedback when positioning the pouch, and they help preserve the pouch's intended flavor profile from the first second of contact. This is especially relevant for users who switch between pouches throughout the day in different settings — a quick wash or hand sanitizer wipe makes a noticeable difference.
Best for: All users, but particularly those who use pouches in professional or social settings where hygiene is part of the overall experience.
Watch out: Overly wet hands can cause the pouch to become slippery or misshapen before it even reaches your mouth — dry your hands thoroughly after washing.
Position the Pouch in the Upper Lip — Not the Lower
The upper lip is the standard and recommended placement for a nicotine pouch. Specifically, the pouch sits between your upper gum and the inside of your upper lip, typically on either side rather than directly in the center. This position offers the most consistent nicotine absorption, keeps the pouch stable, and is the most discreet from the outside.
The lower lip is a common mistake, especially for users who've previously used traditional dip or chewing tobacco, which often sits in the lower jaw. The lower gum is thinner and more sensitive in many users, which can lead to more pronounced tingling and faster fluid buildup. Sticking with the upper lip provides a smoother, more predictable experience.
Best for: First-time users establishing technique, and anyone who has experienced more irritation than expected with lower-lip placement.
Watch out: Placing the pouch too far back on the gum line, toward the molars, can make it uncomfortable to chew or swallow naturally — keep it toward the front of the mouth.
Slide, Don't Press — Use Light Pressure to Seat the Pouch
Once the pouch is roughly in position, use the tip of your tongue or a light press from your upper lip to settle it flat against the gum. The goal is a snug contact between the pouch and the gum surface — not a firm press. Excessive pressure can compress the pouch unnecessarily and push nicotine and flavor into release too quickly, shortening the effective duration.
A well-seated pouch should feel stable without active effort. If you're constantly using your tongue to reposition it, the pouch may be slightly too small for your gum anatomy, or the initial placement was off-center. Take a moment to re-seat it gently before accepting the position.
Best for: Users who find their pouches shift around or fall out during conversation or activity.
Watch out: Don't use your teeth to hold the pouch in place — this compresses it and accelerates flavor loss faster than natural gum contact does.
Expect and Allow the Initial Tingle
A mild tingling sensation during the first few minutes of use is normal and expected — it is not a sign that something is wrong with placement or that the product is too strong. This tingle is the result of active components in the pouch beginning to interact with the gum's mucous membrane. It typically subsides within two to five minutes as the pouch reaches a stable state against the tissue.
New users who mistake this tingle for irritation often spit the pouch out prematurely or move it around, which disrupts the absorption process. Trust the initial sensation, hold the placement steady, and let the experience settle.
Best for: First-time users who have never experienced a nicotine pouch before and need to contextualize what they're feeling.
Watch out: If the tingling is sharp, persistent, or accompanied by soreness rather than a mild warmth, it's worth checking whether you're using a strength level that's appropriate for your current tolerance.
Keep Your Mouth Naturally Still for the First Few Minutes
One of the most effective (and most overlooked) techniques for maximizing a nicotine pouch session is simply letting it settle. The temptation is to work the pouch with your tongue or subtly chew it — especially for users coming from tobacco formats that require active engagement. With nicotine pouches, that movement disrupts the even distribution of moisture across the pouch and can accelerate nicotine release in an uneven way.
For the first three to five minutes, maintain a relatively relaxed jaw and avoid pressing the pouch with your tongue. After that point, the pouch will have settled into a steady release rhythm, and normal conversation and activity won't interrupt the experience.
Best for: Users who notice their pouches delivering an inconsistent or front-heavy experience, with strong initial flavor that fades quickly.
Watch out: Eating or drinking while using a pouch can significantly alter how it feels and how nicotine is absorbed — most users find it more consistent to hold off on food and drink during a session.
Monitor Session Duration — There Is an Optimal Window
A nicotine pouch has a natural effective window, and using it past that point delivers diminishing returns. QOLA's pouches, for example, are designed for a satisfying session of extended duration that keeps the experience consistent rather than front-loaded. When a pouch has fully released its nicotine content, continuing to hold it in place doesn't deliver more — it just maintains a physical presence in your mouth with no functional benefit.
Pay attention to changes in flavor intensity and the textural feel of the pouch. A fully spent pouch will feel noticeably thinner and less springy than it did when first placed. This is your cue to remove it, not a prompt to squeeze more time out of it.
Best for: Users who keep pouches in for extended periods out of habit, only to find that sessions feel inconsistent or the product seems variable.
Watch out: Keeping an exhausted pouch in place can increase the likelihood of minor gum irritation from sustained contact — removing it promptly is better for your gum tissue.
Dispose of the Used Pouch Responsibly
QOLA tins include a built-in compartment specifically designed for spent pouches, so responsible disposal is built into the product itself. Used pouches should never be spat on the ground or left on surfaces — they contain residual nicotine and should be treated the same way you'd treat any small piece of personal waste.
This detail matters beyond basic hygiene. Responsible disposal reflects the broader ethos of the tobacco-free nicotine category: a modern, clean, low-impact format that respects the spaces where it's used. It also sets tobacco-free pouches apart clearly from traditional smokeless tobacco products, which carry considerably more environmental baggage.
Best for: All users, in all settings — public, professional, and social.
Watch out: If a tin's disposal compartment is already full, avoid attempting to overfill it. Find an appropriate bin rather than improvising storage.
Rotate Placement Sites Across Sessions
Using the same spot on your gum for every single session throughout the day can lead to mild irritation over time, even with a gentle, tobacco-free product. A simple and effective practice is to alternate sides — upper left one session, upper right the next — to give each section of gum tissue a natural recovery period.
This is a pattern we consistently see among the most comfortable long-term nicotine pouch users: they treat placement rotation the same way an athlete manages muscle groups. The tissue gets regular contact, but not constant contact on one point. It's a small habit that pays off noticeably over weeks of regular use.
Best for: Daily users who use multiple pouches throughout the day and want to maintain gum comfort over the long term.
Watch out: If you notice persistent soreness in a specific area even with rotation, reduce the frequency of sessions temporarily and allow the tissue more recovery time before resuming normal use.
Quick Comparison at a Glance
Here's a summary of each checklist item, what it's best suited for, its core contribution to the experience, and the key caveat to keep in mind.
| Checklist Item | Best For | Key Strength | Limitation |
|---|---|---|---|
| Choose the right strength | New users and switchers | Prevents avoidable discomfort at the source | High strength ≠ better experience |
| Wash your hands | All users, especially in professional settings | Preserves flavor integrity and hygiene | Overly wet hands reduce pouch grip |
| Upper-lip placement | First-time users, those leaving tobacco formats | Most consistent absorption and comfort | Avoid placing too far toward molars |
| Seat with light pressure | Users whose pouches shift or fall | Stable, long-lasting contact | Don't use teeth to hold the pouch |
| Allow the initial tingle | First-timers calibrating sensation | Sets realistic expectations | Persistent sharp pain warrants attention |
| Keep mouth still early | Users with front-heavy or inconsistent release | Smoother, more even nicotine delivery | Avoid eating or drinking during a session |
| Monitor session duration | Habitual long-holders | Maximizes effective window, protects tissue | No benefit to holding past expiry |
| Dispose responsibly | All users, all environments | Clean, modern use aligned with product values | Don't overfill the tin compartment |
| Rotate placement sites | Daily multi-session users | Maintains gum comfort over time | Persistent soreness warrants a reduced schedule |
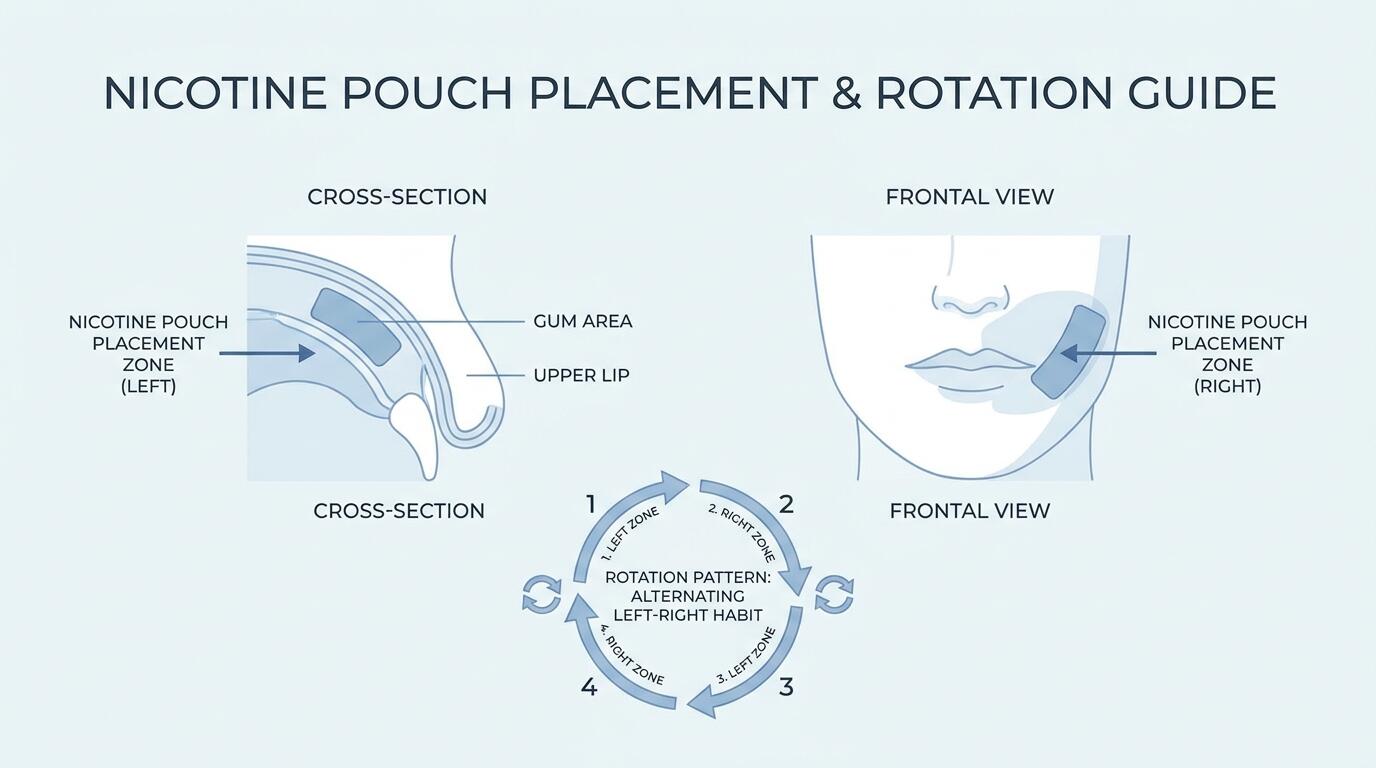
ALT: Diagram showing upper-lip nicotine pouch placement positions with rotation pattern for comfortable long-term tobacco-free nicotine use
How to Work Through This Checklist Based on Your Situation
The right starting point in this checklist depends heavily on where you're coming from. Not every step carries equal weight for every user, so here's a practical mapping to help you prioritize.
If you are completely new to nicotine pouches, work through the list from top to bottom in order. Strength selection, hand hygiene, and upper-lip placement form the foundational trio — get those right before worrying about session duration or rotation. If you're already familiar with what a nicotine pouch is and how it works, you can skip the conceptual groundwork and focus on the technique-specific items: seating pressure, the tingle phase, and keeping your mouth still during the first few minutes.
If you're a regular user experiencing gum discomfort, skip to the rotation and session-duration items first. Persistent irritation in experienced users is almost always a function of overuse at a single site or holding spent pouches too long — both of which are straightforward to correct.
If you're transitioning from traditional smokeless tobacco or dip, pay particular attention to the upper-versus-lower lip item and the "keep still" guidance. These two habits are the ones most directly contradicted by older tobacco-use patterns.
One common misconception worth addressing directly: many users assume that more movement — pressing the pouch with the tongue, shifting it around — means more nicotine delivery. In reality, the opposite is closer to the truth. Nicotine absorption from a pouch is a relatively passive process driven by mucosal contact and time, not by mechanical action. The best thing you can do after placing the pouch correctly is essentially nothing — let the product do the work.
People Also Ask
How do you place a nicotine pouch correctly for the best experience?
A nicotine pouch is placed between the upper gum and the inside of the upper lip, typically toward either side rather than the center. Use light pressure from your tongue or lip to seat it flat against the gum, then keep your mouth naturally relaxed for the first few minutes. This positioning allows for consistent mucosal contact, which is the primary mechanism for nicotine absorption. Correct placement reduces tingle, prevents shifting, and extends the effective flavor window of the session.
Is it normal to feel a tingling sensation when using a nicotine pouch?
Yes, a mild tingling sensation during the first few minutes of a nicotine pouch session is a normal and expected response. It occurs as the active components in the pouch begin interacting with the gum's mucous membrane. This sensation typically subsides within two to five minutes. It is not an indicator of incorrect placement or an overly strong product — though a persistent, sharp discomfort rather than a mild warmth may suggest the strength level selected is higher than your current tolerance warrants.
How long should you keep a nicotine pouch in, and when should you remove it?
The optimal session length for a nicotine pouch varies by product and individual, but the most reliable signal is a noticeable change in the pouch's texture and flavor intensity. A spent pouch will feel thinner, less springy, and significantly less flavorful than it did when first placed. Extending a session well past that point delivers no additional nicotine and increases the duration of gum-tissue contact without benefit. QOLA's pouches are engineered for a satisfying session duration that balances sustained release with practical everyday use.
Summary
Getting placement right is the foundation of a genuinely good nicotine pouch experience — and it's entirely learnable. Three principles underpin everything in this checklist.
First, preparation matters as much as technique. Choosing the correct strength for your tolerance level and handling the pouch with clean, dry hands sets the conditions for everything that follows. No amount of positioning skill compensates for starting with the wrong strength.
Second, the upper lip is your default positioning target — specifically, the area between the upper gum and the inner lip, seated flat and snug without excessive pressure. Keeping your mouth naturally relaxed in the opening minutes of each session allows for the most even nicotine release and the longest-lasting flavor.
Third, long-term comfort is a habit, not a one-time adjustment. Rotating your placement site across sessions and removing spent pouches promptly are small behaviors that add up to a noticeably more comfortable experience over days and weeks.
If you're in the process of building your technique, return to this checklist whenever something feels off. In most cases, the answer is here. And if you're newer to the category and want to understand the broader product landscape — ingredients, formats, and what sets modern tobacco-free pouches apart from older alternatives — QOLA's formulation philosophy and what goes into each pouch is worth exploring as a next step.
Ready to put these steps into practice? Explore the full range of tobacco-free nicotine pouches in diverse flavors and strength levels at QOLA's official site — no smoke, no vapor, no odor, just clean and discreet nicotine the way it should be.
References & Further Reading
- qola.com. "QOLA Nicotine Pouches UK|No Smoking, No Vaping - Just qola".
https://qola.com/uk - U.S. Food and Drug Administration. "Nicotine and Tobacco Products — Regulatory Overview".
https://www.fda.gov - World Health Organization. "Tobacco and Nicotine Products — Public Health Guidance".
https://www.who.int - National Institutes of Health. "Nicotine Pharmacology and Mucosal Absorption".
https://www.nih.gov - Centers for Disease Control and Prevention. "Smokeless Tobacco and Nicotine Alternatives — Health Information".
https://www.cdc.gov
Note: Standards and regulatory guidance may be updated; please check the latest official documents or consult professional advisors.


Comments
There are no comments yet.